
Today we will learn the new features of the tracing engine in Adobe
Illustrator CS6 and talk about its new functions. We will trace a photo,
a sketch and a texture; then we will compare the results between Adobe
Illustrator CS5 and CS6. Let’s get started!
In this tutorial I’ll use a photo a strawberry (credit to deviantART user StockProject1) ; the sketch was kindly provided by Victoria Vasilyeva and the texture (credit to deviantART user ~kingkool6).
 This
allows us to use other panels and tools while tracing. Such features
did not exist in Adobe Illustrator CS5 as well as in earlier releases;
the setting of the tracing was made in the Tracing Options dialog box,
and then it was impossible to access the other objects and interfaces.
This
allows us to use other panels and tools while tracing. Such features
did not exist in Adobe Illustrator CS5 as well as in earlier releases;
the setting of the tracing was made in the Tracing Options dialog box,
and then it was impossible to access the other objects and interfaces.

 The new preset, "Silhouettes" allows quick creation of vector silhouettes.
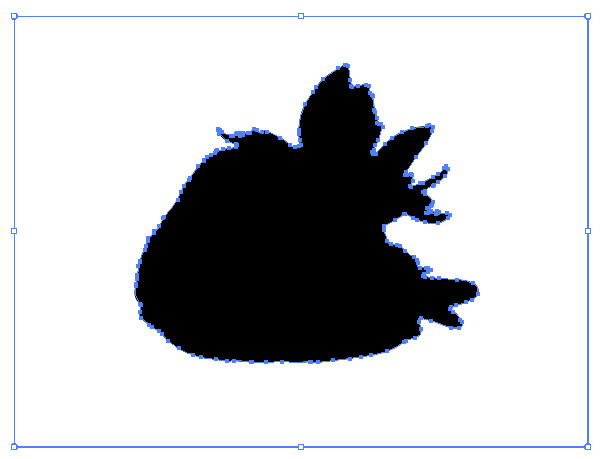
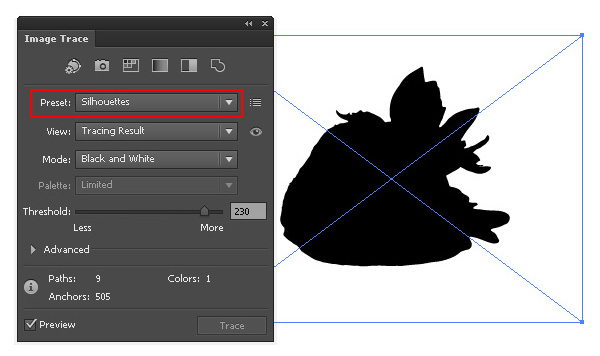 After the Expand command we get the vector object with the optimal amount of points.
 Note,
in Adobe Illustrator CS6 you can set several of the Palette values.
This parameter sets while the vector image is been made in color or in
greyscale. As you can see, the new tracing engine in Adobe Illustrator
CS6 shows better results.
Note,
in Adobe Illustrator CS6 you can set several of the Palette values.
This parameter sets while the vector image is been made in color or in
greyscale. As you can see, the new tracing engine in Adobe Illustrator
CS6 shows better results.
 There
is a new feature in Adobe Illustrator according to which you can
instantly check out your original image. To do so, press and hold the
eye icon near the View option.
There
is a new feature in Adobe Illustrator according to which you can
instantly check out your original image. To do so, press and hold the
eye icon near the View option.

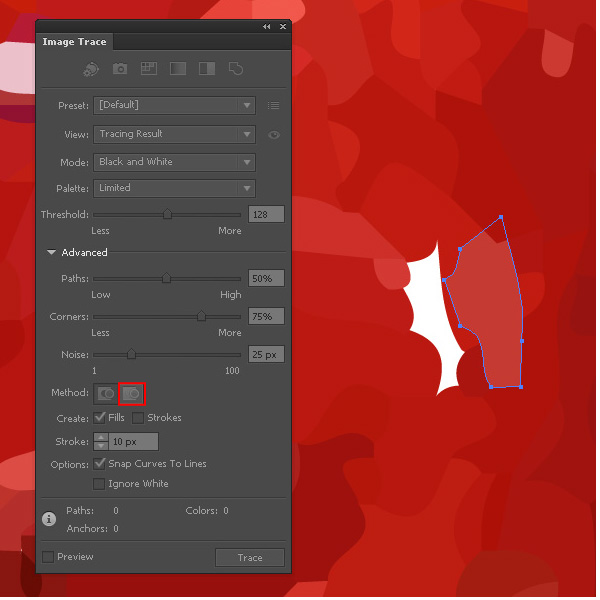
 The overlapping method creates stacked paths, the contours of neighbor objects overlay.
The Minimum Area option corresponds to the Noise option in Adobe Illustrator CS6. This option specifies the size of the smallest areas of the initial image, which will be taken into account while tracing.
The Corner Angle option in Abode Illustrator CS5 corresponds with the Corners option in Adobe Illustrator CS6 and is been set in percentage. The higher value we set, the bigger amount of angles the final image will have.
 In
Adobe Illustrator CS6 there are no such function of the tracing as the
Blur and the Resample. In Adobe Illustrator CS5 the Blur function is for
the reducing the number of small artifacts and smoothing the jagged
edges in the final image. The Resample option allows speeding up the
process of tracing for big size images, losing the quality of the output
image.
In
Adobe Illustrator CS6 there are no such function of the tracing as the
Blur and the Resample. In Adobe Illustrator CS5 the Blur function is for
the reducing the number of small artifacts and smoothing the jagged
edges in the final image. The Resample option allows speeding up the
process of tracing for big size images, losing the quality of the output
image.
 When we use the same preset in Adobe Illustrator CS6 the majority of small details disappear.
 Unfortunately,
you need to change the parameters of the tracing manually in order to
get the same results in Adobe Illustrator CS6.
Unfortunately,
you need to change the parameters of the tracing manually in order to
get the same results in Adobe Illustrator CS6.
 I’ve
used different presets and operated the parameters manually, but I
still couldn’t get the result which would correspond to the result that
can be made in Adobe Illustrator CS5.
I’ve
used different presets and operated the parameters manually, but I
still couldn’t get the result which would correspond to the result that
can be made in Adobe Illustrator CS5.
In this tutorial I’ll use a photo a strawberry (credit to deviantART user StockProject1) ; the sketch was kindly provided by Victoria Vasilyeva and the texture (credit to deviantART user ~kingkool6).
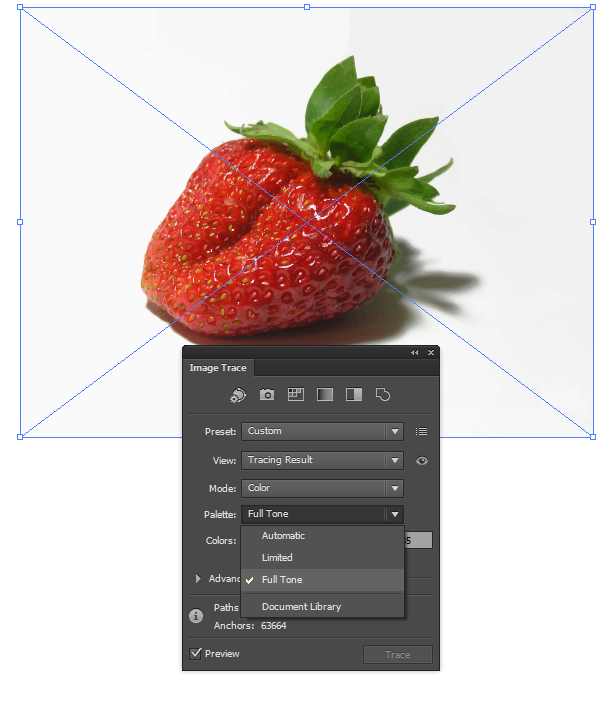
Step 1
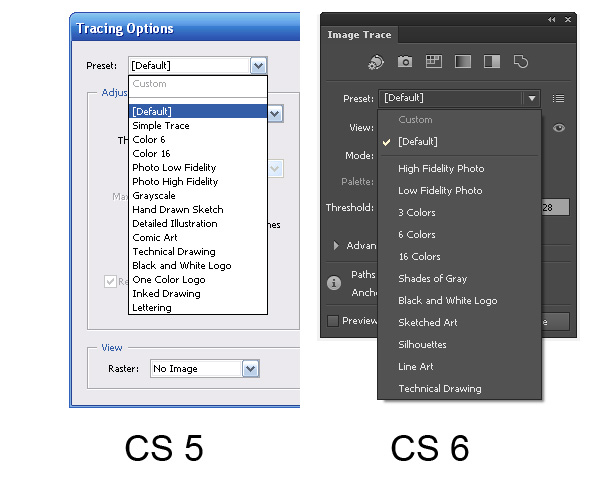
In Adobe Illustrator CS6 the settings of the tracing is in the new Image Trace panel (Window > Image Trace).Step 2
The presets have also changed between Adobe Illustrator CS5 and CS6Step 3
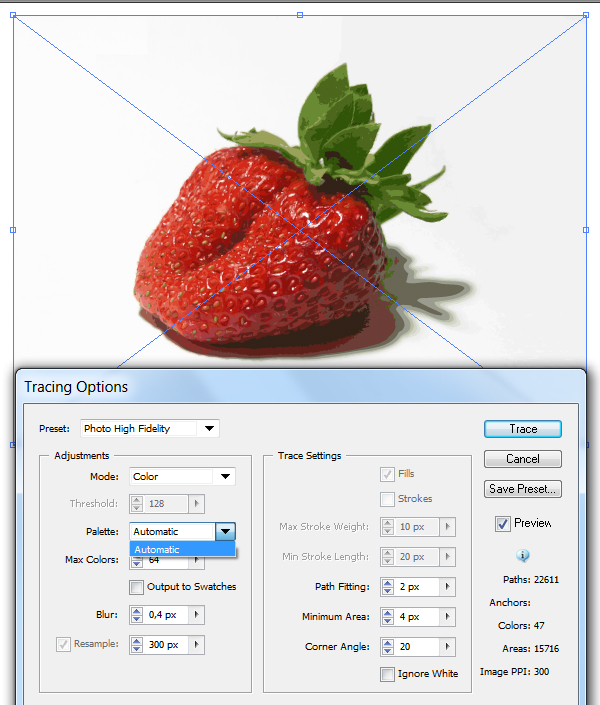
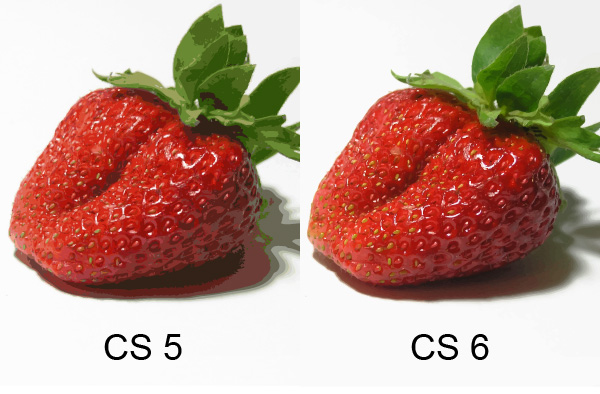
Let us evaluate the quality of the tracing using the same preset High Fidelity Photo in Adobe Illustrator CS5 and Adobe Illustrator CS6.Step 4
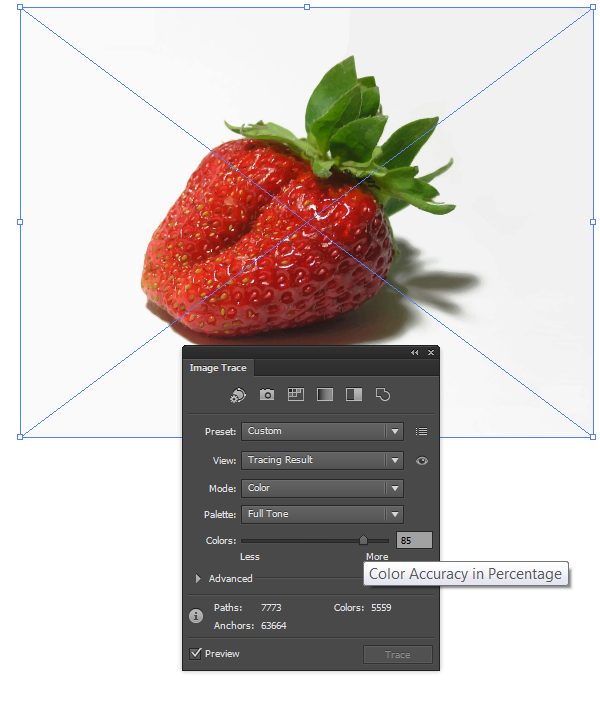
There were some changes in the Colors parameter. This parameter specifies the number of colors which the final vector image will consist of. In Adobe Illustrator CS5 the Max Colors options can be set in the number values, in Adobe Illustrator CS6 the Colors option can be set accurately in percentage.Step 5
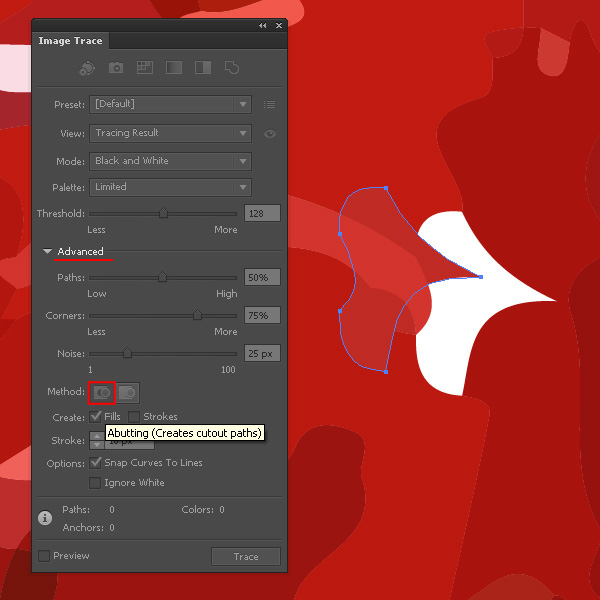
You can get access to additional options of the settings if you press the Advanced key in the Image Trace panel. Now we have an opportunity to choose a tracing method. The Abutting method creates cutout paths. The contours of neighbor objects match.Step 6
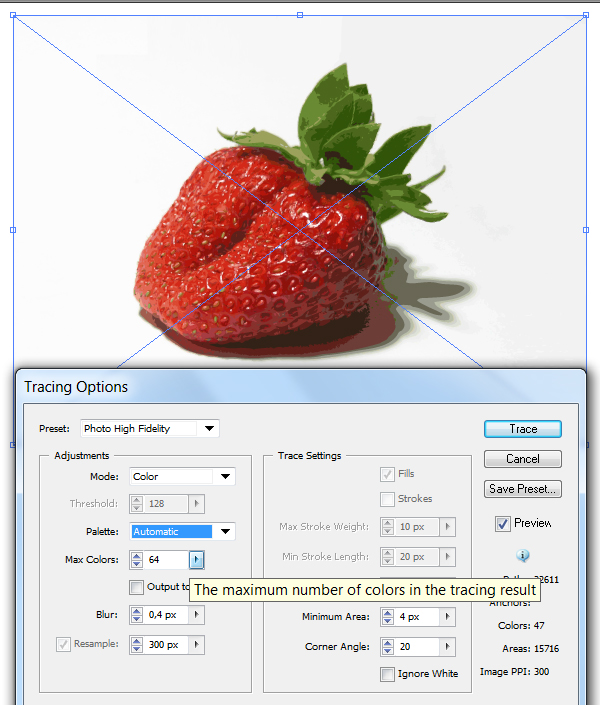
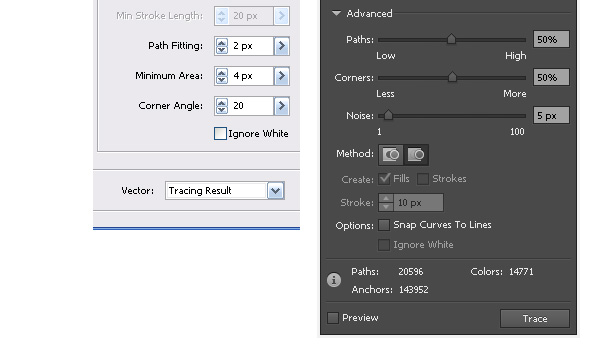
The Path Fitting option defines the accuracy of the tracing of the initial raster image. In Adobe Illustrator CS5 the smaller value allows to create a more accurate contour, the bigger- the rough contour. In Adobe Illustrator CS6 it is vice versa, the bigger the value is the more accurate contour we get.The Minimum Area option corresponds to the Noise option in Adobe Illustrator CS6. This option specifies the size of the smallest areas of the initial image, which will be taken into account while tracing.
The Corner Angle option in Abode Illustrator CS5 corresponds with the Corners option in Adobe Illustrator CS6 and is been set in percentage. The higher value we set, the bigger amount of angles the final image will have.
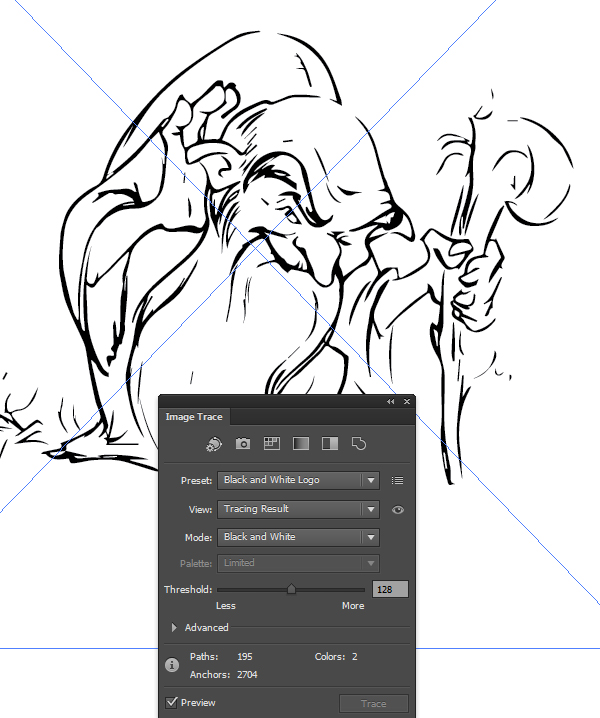
Step 7
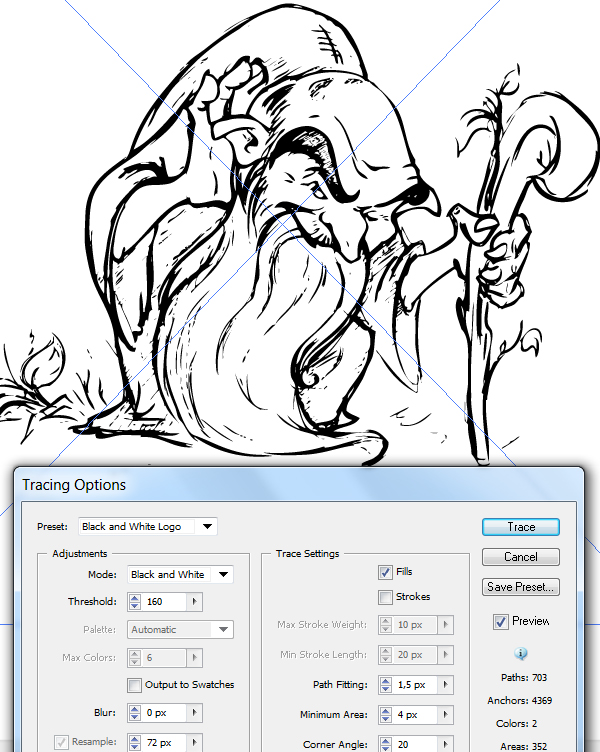
Let’s see how the new tracing engine works with sketches. Apply the preset Black & White Logo. The tracing of the sketch in Adobe Illustrator CS5 shows good results.Step 8
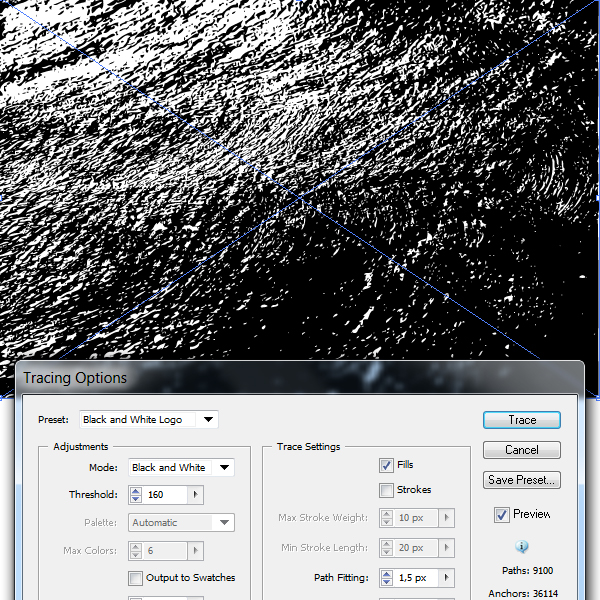
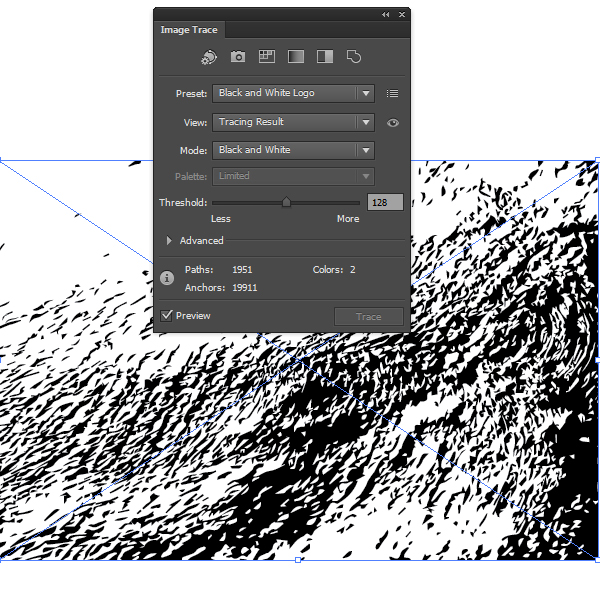
Let’s try to make the tracing of the texture. We will use the same Black&White Logo preset. As we can see, the result of the tracing in Adobe Illustrator CS5 looks better than in Adobe Illustrator CS6
I dont know that, how to use it... but its clear..
ReplyDeleteClipping Creations India
Offshore Clipping Path
Arafin Media
Nice post.
ReplyDeleteBest Website Development Company in Coimbatore
Top 10 WordPress Website Development Agency in Coimbatore- 2023 Review