
Final Product What You'll Be Creating

Unlike Photoshop, however, Illustrator gives you the flexibility to edit individual paths. Since Illustrator’s brush strokes are vector, you can change the shape, width, color and blending mode to achieve exactly the look you want. You can even delete a brush stroke you don’t want. Try that, Photoshop! This tutorial will use another feature introduced in CS5, Draw Inside. Let’s get started!
Step 1
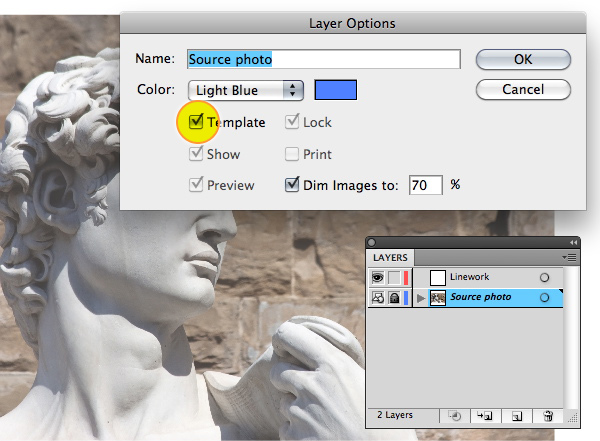
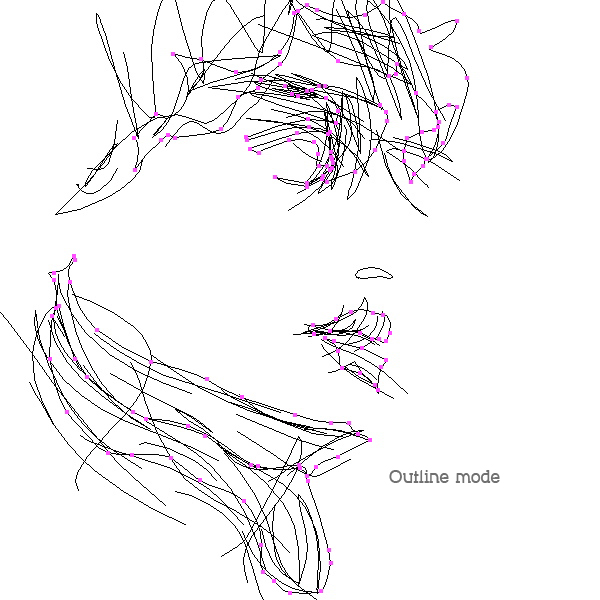
You can use this technique with any line art or illustration. I am going to quickly create my line art by tracing a source photo from Wikimedia Commons, photo by Guillaume Piolle.

Step 2
To create the line art, use the “Tapered Strokes” brush from the default set. You can adjust the brush settings by double-clicking the Brush Tool to bring up its options. This is a matter of personal preference; experiment until you find a setting that works for you. I prefer to set the brush so that the paths confirm fairly closely to my strokes, but don’t end up with too many points.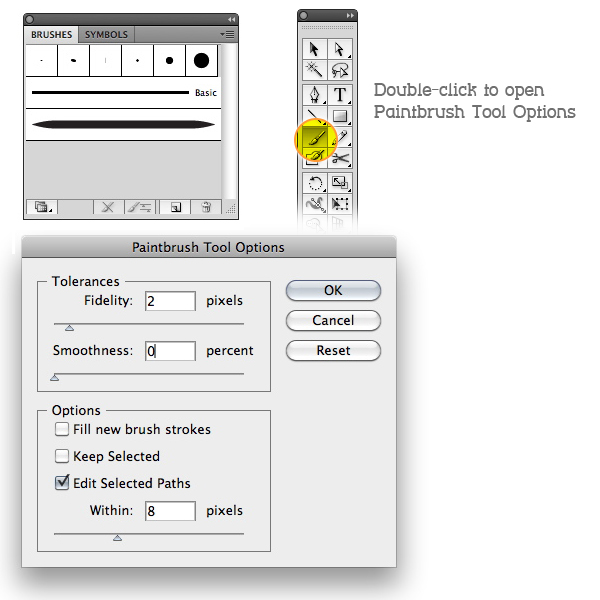
Step 3
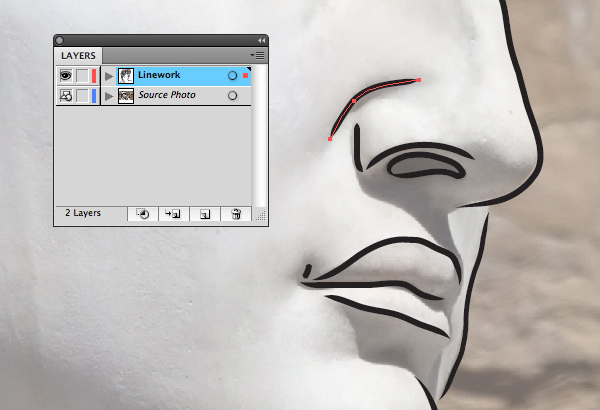
Now you’ll do the modeling with the Bristle Brush. Lock the line work layer and create a new one below it.In order to get the most out of the Bristle Brush, it’s best to understand its settings. I’ll add a detailed explanation of each setting at the end of this tutorial for reference.
It’s also important to note that to get the full benefit of the Bristle Brush, you must use a Wacom Intuous 3 or higher tablet and a 6D Art pen. The tablet and pen combination will respond to tilt, bearing, rotation, and pressure. A mouse alone will only respond to movement, but will still work fine for this tutorial.
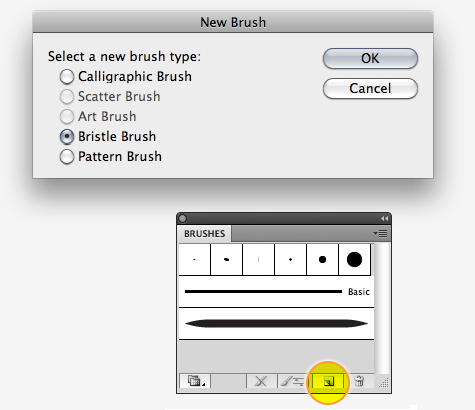
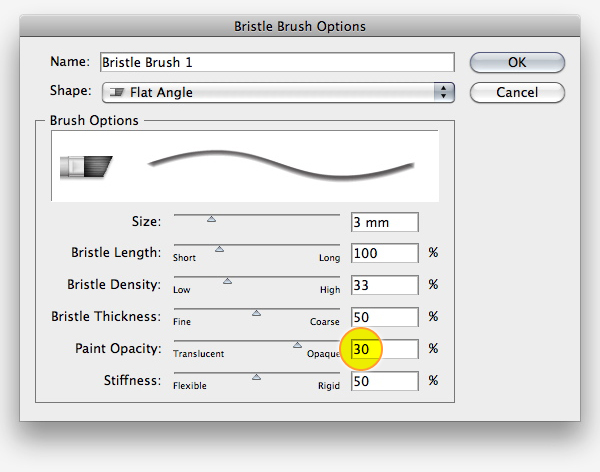
To create a new bristle brush click the new brush icon on the brushes panel. Choose Bristle Brush, which will bring up its options. There are tons of possibilities with a Bristle Brush, but to start, choose Flat Angle as the shape, and increase the size to 5mm. Leave the other settings as they are, with the exception of the Opacity. Set it low, to about 30%.
Step 4
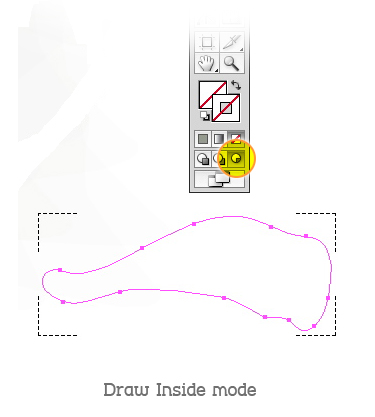
Using the Pen Tool, outline a flat area of shadow on the artwork. Here, I’ve drawn around the top lip. Select the shape and then choose Draw Inside at the bottom of the tool panel. Dotted-line brackets will appear around the shape, letting you know that you’re in Draw Inside mode. You can deselect the shape, but the brackets will remain.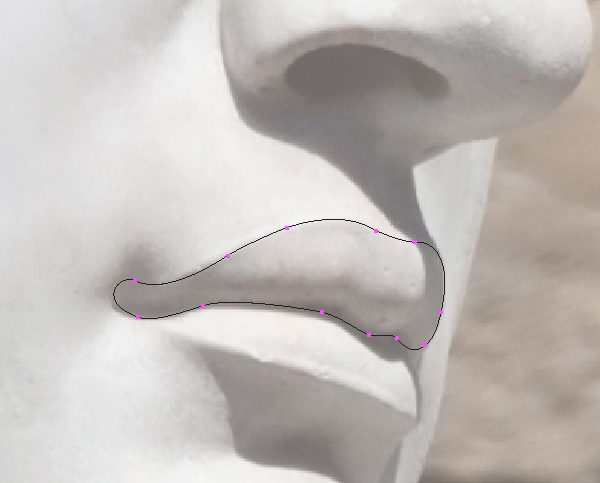
Step 5
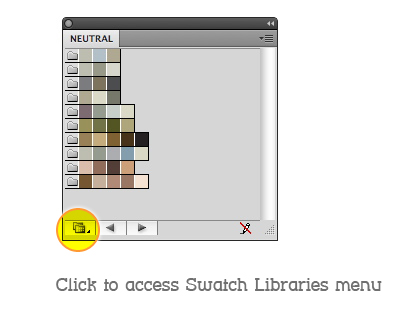
Choose a warm gray for the stroke color. I’ve used some swatches from the “Neutral” library, which can be accessed by clicking the Swatch Libraries Menu icon on the bottom left of the Swatches panel.If you didn’t deselect the lip shape in the previous step, it may frustrate you to see that it now has the stroke color you just picked. This can be really annoying, but you just have to remember to deselect the shape. The dotted-line brackets indicate that the shape is still in Draw Inside mode.
Step 6
You may wish to turn off the photo layer, or move the photo to the side so you can use it as a reference. Now just start drawing strokes inside the lip shape. Depending on your Opacity setting, it may be hard to see a single stroke. You may also want to increase the brush size in the Strokes panel for wider swaths of color.Keep painting and building up color and texture. Note that different brush strokes will interact in this way, but if you just use one brush and scrub back and forth, it won’t build up. In other words, a single brush stroke does not interact with itself, so deselect the existing strokes and paint new ones to layer the color.
Step 7
Do the same for the other shadow areas. First choose Draw Normal mode, then select the new shape and choose Draw Inside again. Make sure you’re finished with one before proceeding to the next. Once you exit Draw Inside Mode for a shape, you can’t access it again.TIPS: If you want a darker stroke, you can change the opacity on the fly by using the numeric keys: 1 for 10%, 2 for 20% and so on.
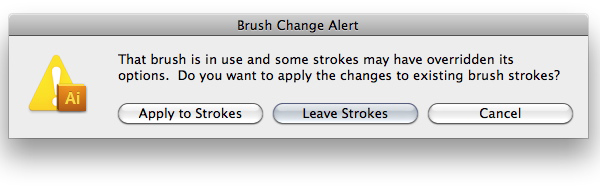
You can double-click any Bristle Brush in the Brushes panel to edit it. If the brush you are changing is already in use in your file, you’ll get this warning. Unless you want every brush stoke to update with your changes, click “Leave Strokes” to leave the existing brush strokes unchanged.
Step 8
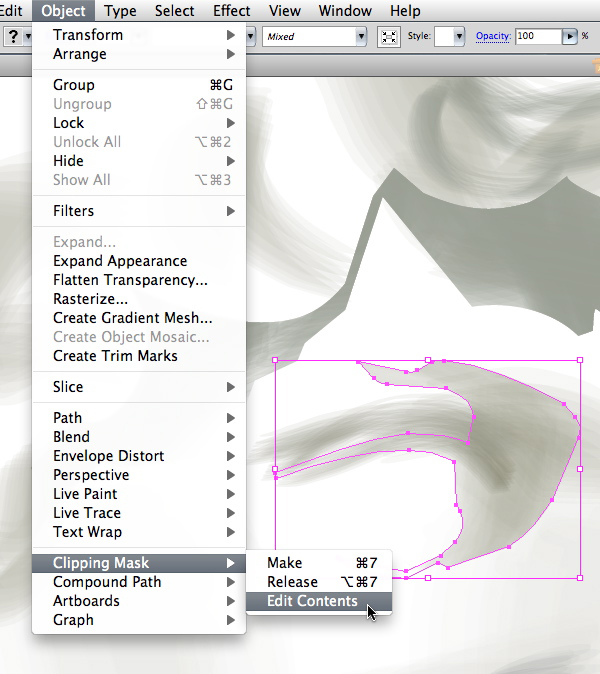
Once all the shadow shapes have been drawn and painted, your image should look something like the one below. “Draw Inside” simply creates a Clipping Mask before you draw. So if you want to edit some of the paths or start over, you can go to Object > Clipping Mask > Edit Contents.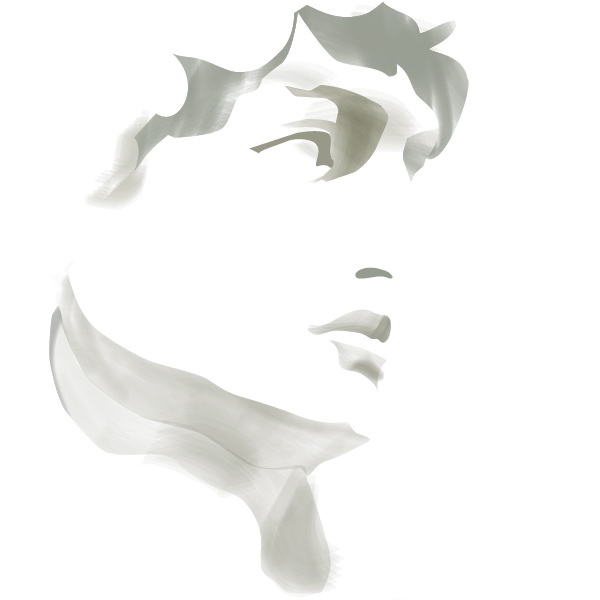
Step 9
If you haven’t saved your work, now’s a good time to do that. You’ll most likely get a warning when you save, telling you that your document contains Bristle Brush paths and transparency. Well, duh. Actually, this is an important warning to heed, because Bristle Brushes can make the document very complex and the file size quite large. You can turn off the warning so it doesn’t appear again during this work session.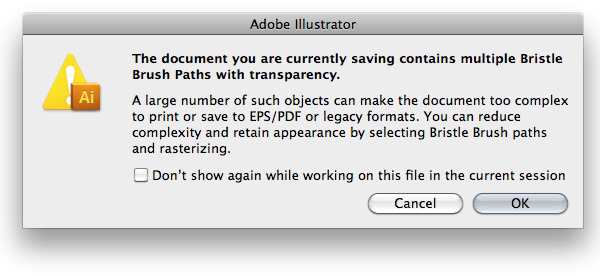
Step 10
Now we’re going to add some more color, texture and modeling. Create a new Bristle Brush if you want to experiment — a Flat Fan will work nicely.As before, set the Opacity fairly low, then begin painting along the contours of the face and neck. It’s kind of a sculptural process, with the advantage of being able to edit the paths or start over if you want. If you paint a stroke you like, you can copy it and move it to another part of the illustration. You can change the stroke width, the opacity and the blending mode, just as you can with any vector path.
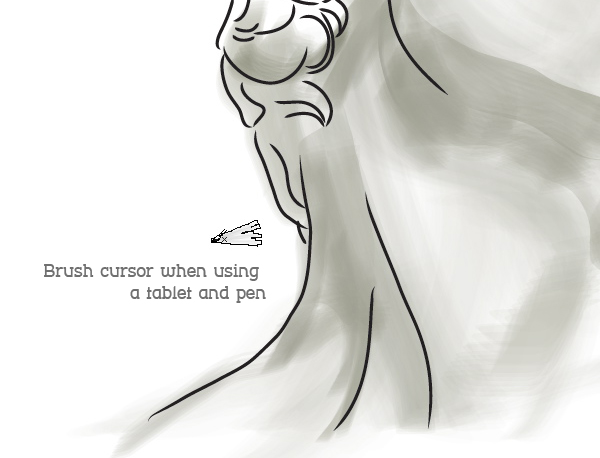
If you’re using a graphics tablet and pen, you’ll get visual feedback as to the direction, tilt and bearing of your brush. Still, it can be a rather random process, but that’s part of the fun, and can lend itself to some happy accidents.
Step 11
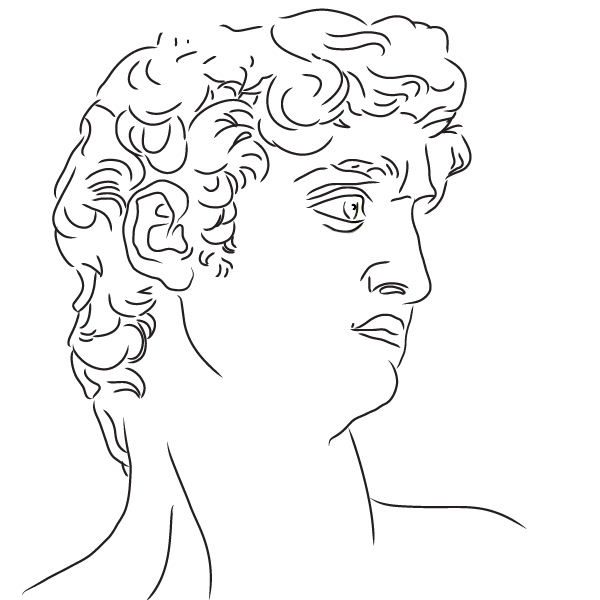
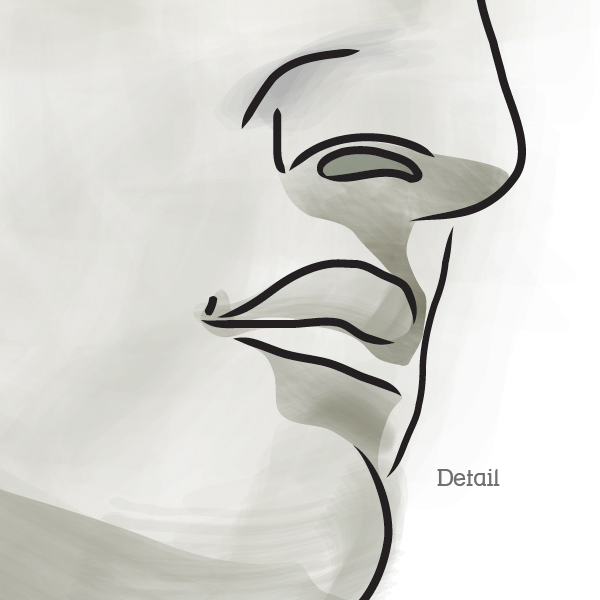
I can’t tell you exactly where and how to paint the rest of the strokes, you’ll just have to play around until it looks right. The beauty of using Illustrator instead of Photoshop (or real paint, for that matter), is that if it gets too muddy, you can just delete some strokes or change their opacity. The final image is below.Conclusion
Due to their transparency and fluidity, Bristle Brushes can be used for a wide variety of coloring applications. And because they’re vector paths, you get the best of both worlds: The painterly effects of Photoshop brushes with the control and flexibility of Illustrator.Keys to the Bristle Brush Options:
- Name: Self-explanatory.
- Shape: There are 10 styles. Each one attempts to mimic a real-life brush.
- Size: This is the diameter of the brush. When you buy brushes in an art supply store, their size is measured at the point where the bristles meet the handle, so this measurement refers to that. Use the slider to change, or enter numerals from 1mm to 10mm.
- Bristle Length: Measured from the bristle tip to the point where the bristles meet the handle.
- Bristle Density: Has to do with the number of bristles in a brush. 1% is basically one bristle, but unlike a real-life brush, that one bristle will be the diameter of the brush as it is set in the Size field.
- Bristle Thickness: Use the slider or enter numbers in the field.
- Paint Opacity: 1% is translucent and 100% is opaque.
- Stiffness: I like to think of Stiffness as the “squirly-ness” of the brush. That is, the lower the stiffness, the less the stroke will conform to the path you actually draw. This can be good for random strokes and surprises.
Great instruction step by step and it's best for learning. I follow your all tutorial and after day by day i'm expert. Thanks for kind tutorial.
ReplyDeleteclipping path service
clipping path
color correctoin service
Coloring And Line Work In Illustrator Cs6 >>>>> Download Now
Delete>>>>> Download Full
Coloring And Line Work In Illustrator Cs6 >>>>> Download LINK
>>>>> Download Now
Coloring And Line Work In Illustrator Cs6 >>>>> Download Full
>>>>> Download LINK pI
Amazing work by the designer. thanks for sharing beautiful tutorial..
ReplyDeleteClipping Creations India
Offshore Clipping Path
Arafin Media
Coloring And Line Work In Illustrator Cs6 >>>>> Download Now
ReplyDelete>>>>> Download Full
Coloring And Line Work In Illustrator Cs6 >>>>> Download LINK
>>>>> Download Now
Coloring And Line Work In Illustrator Cs6 >>>>> Download Full
>>>>> Download LINK MQ
Best Advertising & Digital Branding Agency in Coimbatore</
ReplyDeleteI really enjoyed this guide on coloring and line work! As a Digital Marketing Agency in Coimbatore, we understand the impact of great design on marketing success. Your techniques will help us create more visually appealing content for our clients. Keep up the great work!
ReplyDelete