In this movie, I will show you how to zoom in and out in Illustrator cs6..
And the idea is this, sometimes you are going to want to magnify portions of your illustration
in order to fine-tune adjustments, and other times you are going to want to zoom out so that you can take in your entire artwork at a time.
I am working inside of a document called Welcome again.ai found inside the 03_navigation folder.
 If I go up to the Window menu and choose Artboards command, you can see that this document contains
a total of six Artboards.
So we have the central Welcome screen, and then we have renderings of a bunch of paint tool cursors.
These are the new paint tool cursors in Illustrator cs6 and then finally I have got this big
Artboard that contains everything.
I just wanted you to see that because these Artboards will become important in a moment.
In the meantime though, you zoom in and out from an Illustration right here located in the View menu.
Now notice that each one of them has a keyboard shortcut.
I find that folks fall into a couple of different categories where shortcuts are concerned.
They either love them and they use them all the time that would be me, by the way.
Illustrator CS6 Tutorial Video
That's why I mentioned them as I am going through these movies. Other folks just hate them especially when they are first trying to come to terms with a piece of software.
So tell you this you can use keyboard shortcuts or not but I do recommend that you at least
learn these shortcuts here.
Because that will help you move more quickly through the software, also it allows you to
spend less time on focusing on the mechanics of Illustrator and more time and energy on your artwork.
So if you want to zoom in, you can choose the Zoom In command as I am doing here but you are better of using the keyboard shortcut which are easy to remember Ctrl+Plus, or Command+Plus
on the Mac, and you can see that that's zooming me in incrementally.
If I want to Zoom Out, I press Ctrl+Minus, or Command+Minus on the Mac, and again that
zooms me out incrementally.
Notice that I am viewing the Illustration right now at 100%.
Now extensively, this is Illustration showing you Artboard at the sizable print.
However, it is not really accurate and the reason is Illustrator is assuming your screen
resolution is 72 pixels per inch which dates way back to those old 1984 Macintosh boxes,
Illustrator CS6 Tutorial Video
that just isn't the case anymore.
Your screen is more likely to have a resolution in a neighborhood of 100 to 120 pixels per
inch, in which case the Artboards is actually going to print larger than it appears at 100%.
So that's just something to bear in mind.
Now if this were a program like Photoshop, and we kept zooming in from 100% then we would
get bigger and bigger pixels, but Illustrator cs6 is working with vectors, and it is rendering
those vectors to your screen on the fly and as a result we get greater and greater detail
as we zoom in, and you can see that you can zoom in all the way to 6400%, which is a sufficient
level of magnification to see a large bacteria, which is why I have gone ahead and drawn a
little bacteria, right here an Illustration.
That's how big the largest bacteria are.
So Illustrator really allows you to hone in on that detail.
Now if you want to return to the 100% percent view at any point in time, you just
Ctrl+1, or Command+1 on the Mac.
Illustrator CS6 Tutorial Video
You may also remember from the previous chapter that if you want to zoom in on a specific
Artboard, all you have to do is double-click on that Artboard here inside the Artboards panel.
Another way to work, if I press Ctrl+Alt+0, or Command+Option+0 on the Mac, to go all the way out and take in my entire artwork at a time.
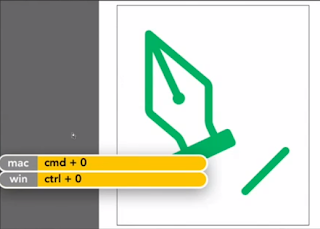
I can click on any one of these Artboards to make it active, and then press Ctrl+0, or Command+0 on the Mac, to zoom in on it, and just as with double-clicking on an Artboard,
here inside the Artboards panel, Ctrl+0, or Command+ 0 goes ahead and fits the Artboard on the screen.
And incidentally, if you ever need to refresh your memory on the shortcuts, all you need
to do is go up to the View menu and check out these five commands right there. These are the shortcuts that I've mentioned.
Ctrl+Plus, or Command+Plus to Zoom In, Ctrl+Minus, or Command+Minus to Zoom Out, Ctrl+0, or Command+0
to fit the Artboard in the window, Ctrl+Alt+0, or Command+Options+0 on the Mac, to fit everything,
the entire document inside the window, and then Ctrl+1, or Command+1 on the Mac, to go
to the Actual Size which is the 100% view. And that's how you zoom in and out from an Illustration. from the keyboard inside Illustrator cs6
Comments
Post a Comment